How to assemble your astrolabe kit
1. Measure the altitude of the sun
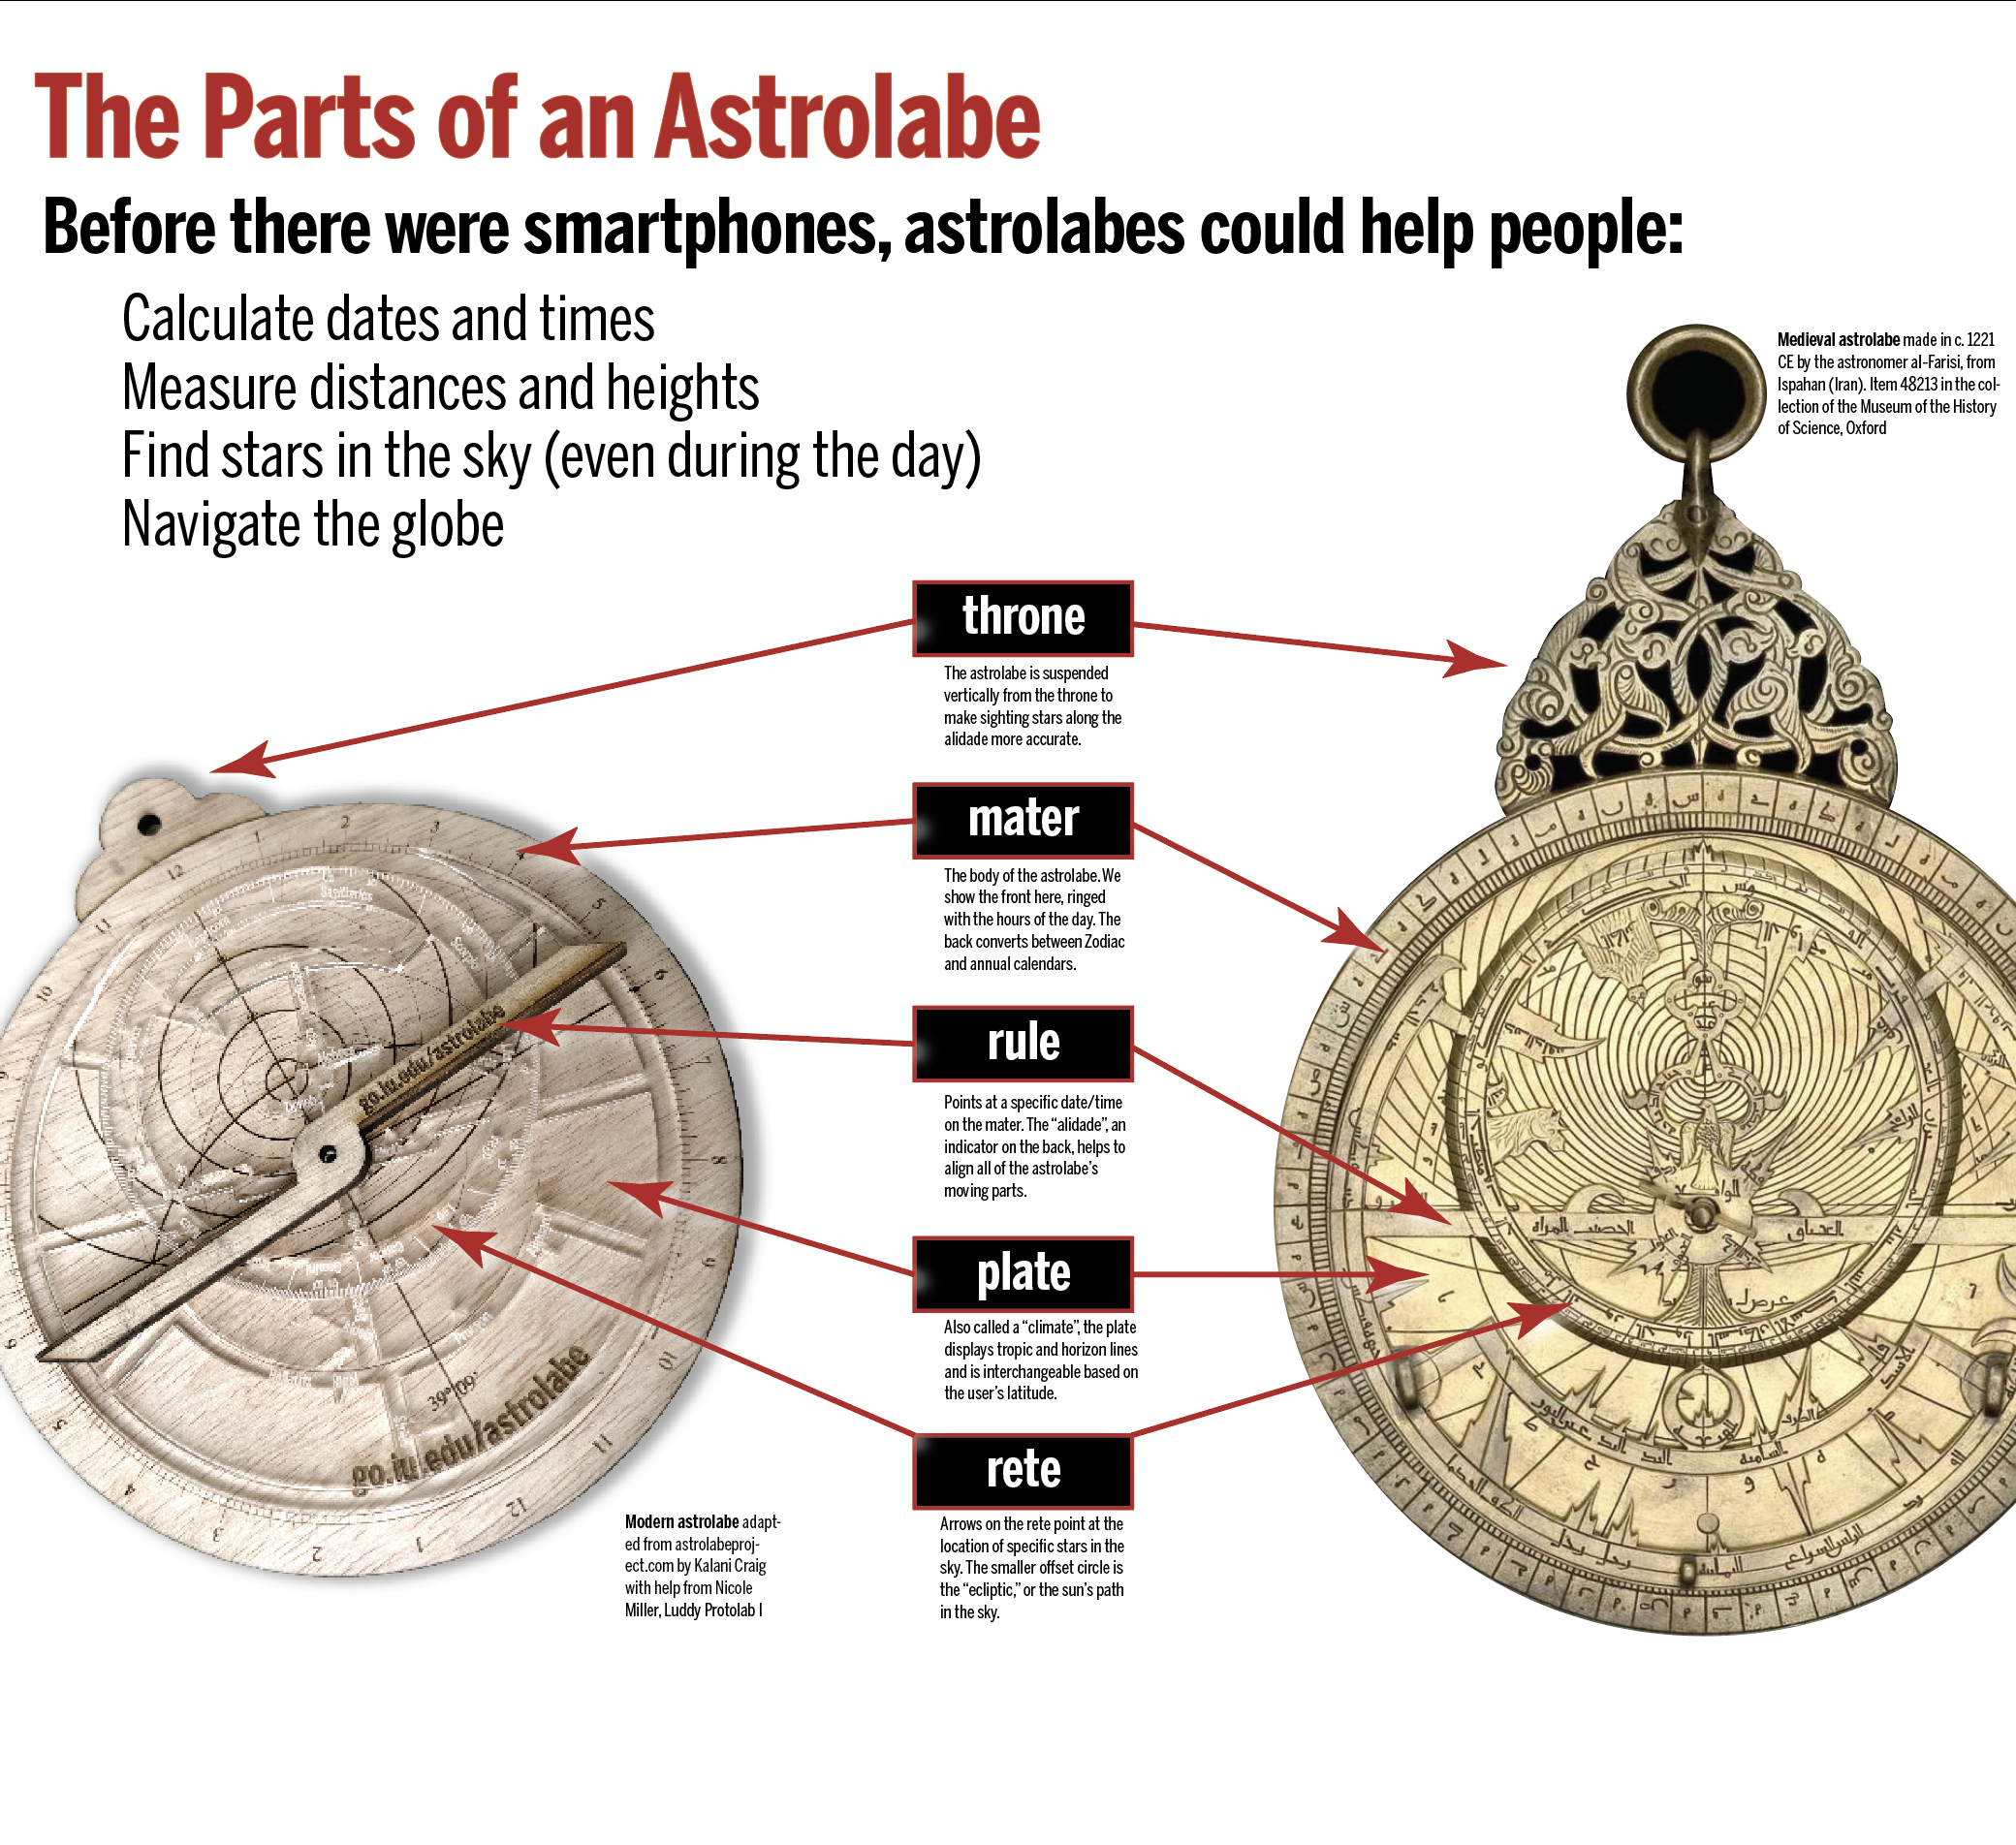
- Hang the astrolabe vertically. You can do this by putting a string through the throne to suspend the astrolabe. If your astrolabe isn't precisely vertical, it will affect your calculations.
- On the back of the astrolabe, rotate the alidade until it is pointing to the sun. NEVER look directly at the sun! On a medieval astrolabe, the alidade would have two small extensions called "sights" and you could align the spot of light coming through the fore-sight with the hole in the rear sight, all without looking at the sun. You can achieve this same effect by taping a straw along the center edge of the alidade and rotating the alidade until the straw is pointing at the sun, and the circle of light passing through it is round and not distorted.
- Holding the alidade in place, measure the angle of altitude (in degrees from the horizon) by reading off where the alidade points on the scale around the very outer rim of the astrolabe.
2. Estimate the current time
- Measure the altitude of the sun (described above).
- On the back of the astrolabe, line up the alidade with today's date on the annual calendar and read off the corresponding date on the Zodiac calendar just above. This tells you where the sun is in the Zodiac cycle.
- Flip your astrolabe over. On the front of the astrolabe, move the rule so that it crosses the ecliptic circle on the rete at that same date on the Zodiac calendar.
- Next, rotate the rete and rule together to move their point of intersection (where the rule crosses the Zodiac scale) directly over the altitude line on the plate that matches your measurement of the sun's altitude.
- Finally, read the solar time according to the scale on the outer rim. This scale is in 5-minute increments. Note that there are two possible times – one in the morning, and one in the afternoon – where your rete and rule will intersect the altitude line together. For morning, use the altitude line on the left hand side of the astrolabe, and for the afternoon use the right hand side.
3. Predict the times for sunrise and sunset
- For whatever date you want to predict sunrise or sunset, move the alidade on the back of the astrolabe to that date on the annual calendar, then read the matching date on the Zodiac calendar just above.
- On the front of the astrolabe, align the rule with the Zodiac date on the ecliptic circle, the part of the rete that shows the path of the sun through the sky and in relation to the stars.
- Rotate the rule and rete together until the point of intersection (where the rule crosses the Zodiac scale) lies just above the horizon line on the lefthand side of the astrolabe, which represents the eastern horizon.
- Read the time of sunrise on the outer time scale on the rim of the astrolabe. Note: this scale is in 5-minute increments.
- To find sunset on the same date, keep the rule and rete aligned and rotate them together clockwise until the intersection point is just above the western horizon line (on the righthand side of the astrolabe).
This is the basic process, but there are some limitations. This calculation does not account for the equation of time (the difference between timekeeping with clocks and timekeeping by tracking the sun in the sky). It also does not account for Daylight Savings Time!
4. How to navigate
You'll need three pieces of information before you start:
- The time and date you'd like to know the star positions for
- How far ahead of, or behind, you are from Greenwich Mean Time (GMT)
- Which direction is south
- On the back of the astrolabe, align the alidade with today's date (April 8) and then look to the outer ring to find the Zodiac date. April 8 = Aries 22.
- Flip the astrolabe over and locate the Zodiac date on the ecliptic circle. Align the rule with that date (Aries 22).
- Add or subtract your GMT difference from the time of day you've chosen to get the right hour. (EDT is 5 hours behind GMT, so if the eclipse happens at 3:05pm EST, your hour selection on the astrolabe will be 8:05pm). Then rotate the rule and rete together until the rule points at the GMT time you identified.
- Hold the astrolabe flat in front of you and point the throne away from you and toward the south. (On the astrolabe, south is forward, north is behind you, east is to your left, and west is to your right.)
- Find the horizon lines on the center of the plate. The north horizon that is behind you is marked by the horizon line that curves through the center of the plate. The south horizon line is marked by the outer curve of the rete.
- Find the zenith, or the tiny circle between the two horizon lines. This marks the spot directly over your head in the sky. Between the zenith and the horizon lines are degree lines at 20, 40 and 60 degrees.
- The star pointers on the rete align with horizon marks on the plate that will help you figure out which direction (N/S, E/W) and how high above the horizon to look for your star. (20 degrees is closer to the horizon; 60 degrees will require you to look up at a fairly steep angle.)
5. Calculate the height of an object
- Hold your astrolabe vertically by suspending it on a string through the throne.
- Walk away from the object you want to measure until your view along the alidade shows a 45° measurement the on the astrolabe. As above, you can attach a straw to use as a fore-sight.
- Measure the height of the astrolabe above the ground.
- Measure the distance to the base of the object.
- The height of the object is the distance from the astrolabe to the ground plus the distance to the base of the object.
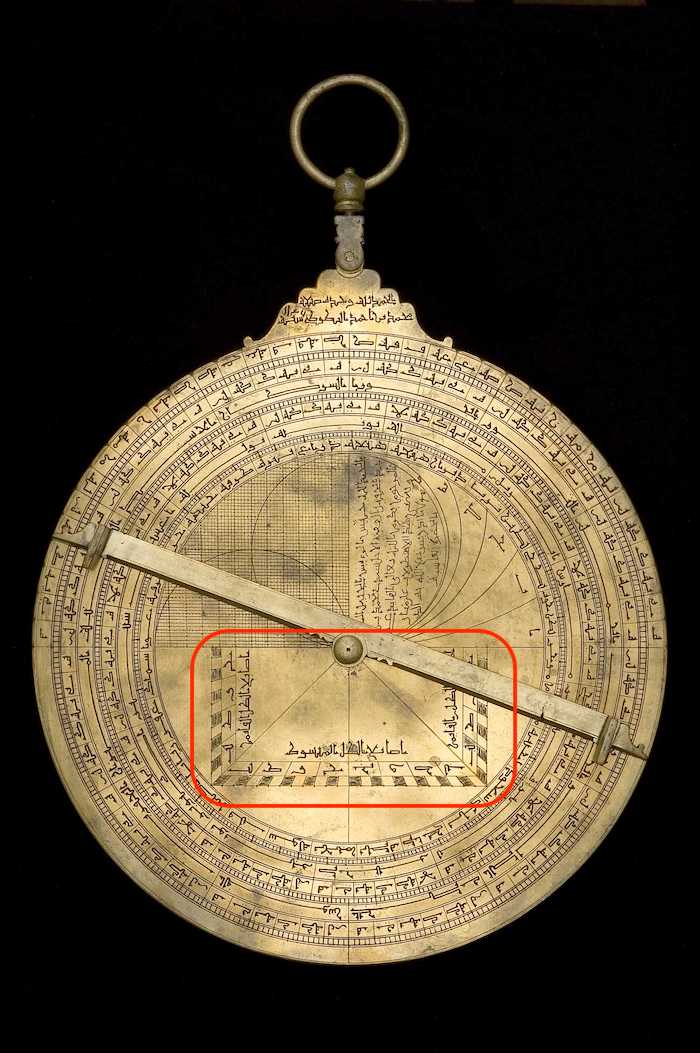
On many astrolabes, the back of the mater often contained a shadow square, which is a tool for estimating object heights or distance from the viewer by approximating the ratio between an object's height and the shadow it casts, based on the altitude of the sun.
Here is the shadow square from the back of an 18th century Morrocan astrolabe in the collections of the History of Science Museum at the University of Oxford:


